Click4Assistance UK Live Chat Software
A photo of Lucy Canoel

Lucy Canoel

E-commerce Assistant

Lucy was the E-commerce Assistant at The Garden Furniture Centre for five years.

Whilst managing the company's two websites, Lucy also assisted where she could within the company - whether that was blog content writing, off-site videography, or assisting the graphic designer. Having gained invaluable experience and knowledge with us, she now pursues her love for E-commerce elsewhere.

You can find her on Linkedin at: https://uk.linkedin.com/in/lucy-canoel

Getting your garden ready for a summer party...

Getting your garden ready for a summer party...

With restrictions lifting, we are now able to have those necessary reunions with our loved ones. If you’re planning on hosting a garden party for your reunion, you will need to know what necessary preparations to make – and that is where we can help!

We have put together a detailed guide to help you get your garden ready for a summer party, from the practical side to the fun…

TIDYING AND ORGANIZING

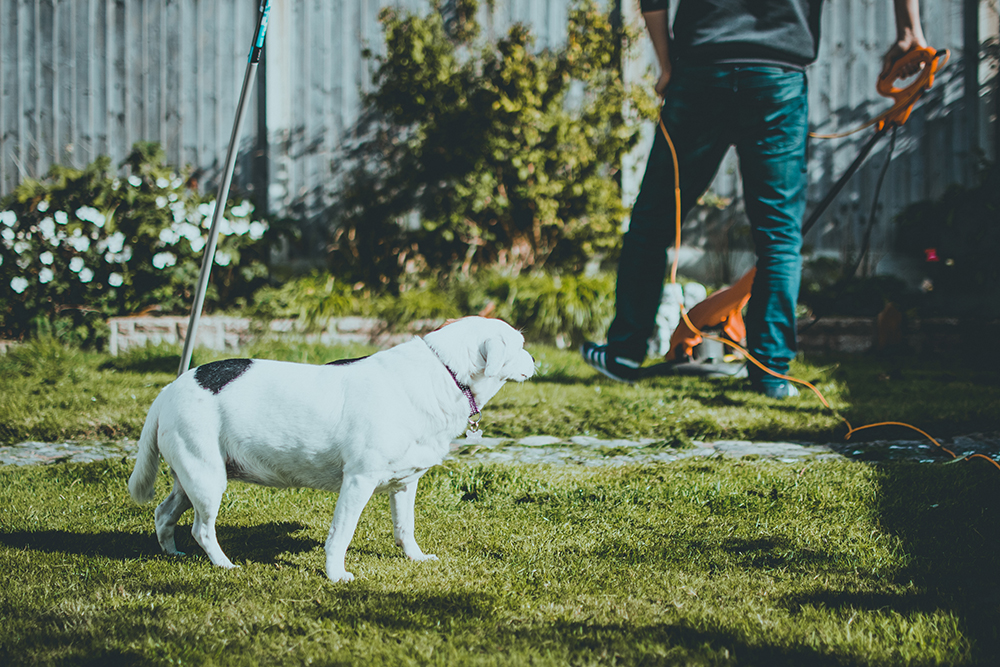
The first thing we all think of when we decide to host is the dreaded task of tidying and organizing. The basic tasks needed to tidy the garden is the usual - mowing, feeding the lawn, watering the plants, and de-weeding. However, when preparing your garden for a party, you will need to pop your creative hat on.

Getting creative with your garden beds by giving them a freshen up with some new plants or sowing some seeds of your own, can really help transform the garden. We recommend strong scent filled plants like jasmine, rosemary and lavender which smell divine in the evening.


CREATING A COCKTAIL GARDEN...

Impress your guests by plucking fresh herbs and edible flowers from your impressive edible cocktail garden. A planter full of fresh herbs and edible flowers which can be used on the day for cocktails and food, really shows you have pulled out all the stops for a great party. We suggest planting these edible plants in a container or planter with helpful labels and placing this in clear view right by your bar or BBQ. If you are wondering what plants are best –you can find helpful guides online. A few ideas are lavender, spearmint, lemon verbena, Cuban mint, and thyme. We have a variety of planters which would be perfect for this – like our rub a dub tub planter’s...
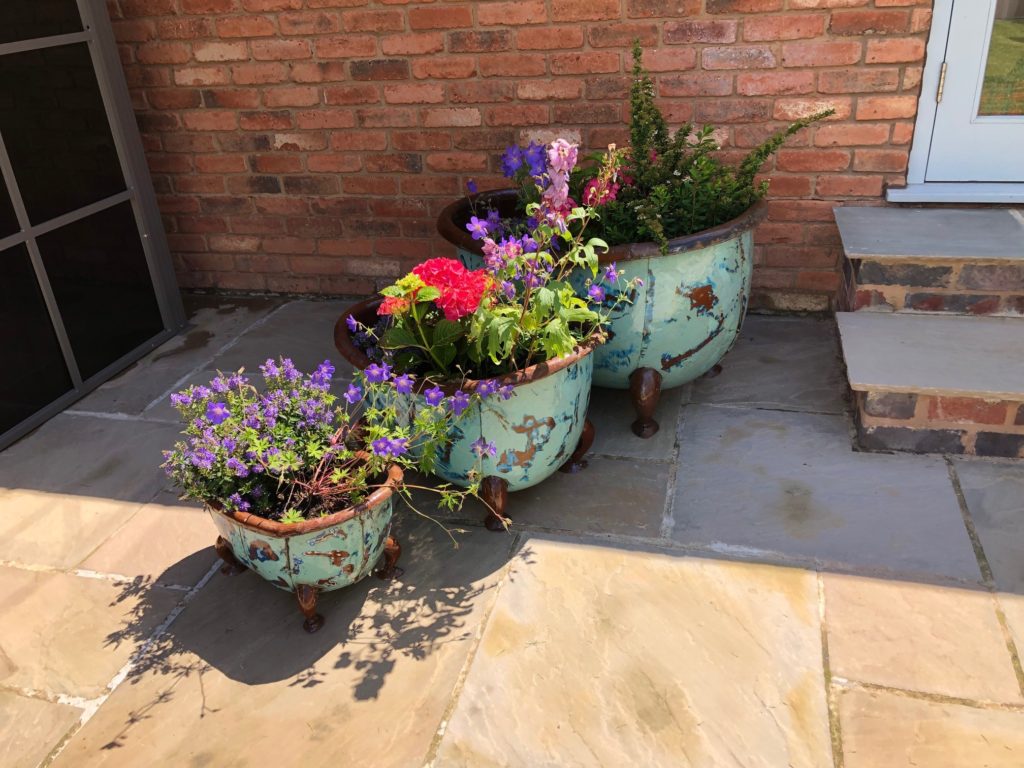
Featured: Our Rub A Dub Dub Planters.

It will surprise you just how many different concoctions you can now make with your new bar planter!

SEATING

Outdoor seating is important and there are many different forms of it – bar, dining, and sofas. Of course, when you think of a party you think of the bar and dining area firstly. Creating a pronounced bar or dining area can help the event seem less thrown together by dividing up the garden into unique ‘zones’ during the party. Of course, if you do invest in an outdoor bar, this can also provide extra seating. Like our up-cycled Tuk Tuk Bar – perfect for a Mediterranean style garden.
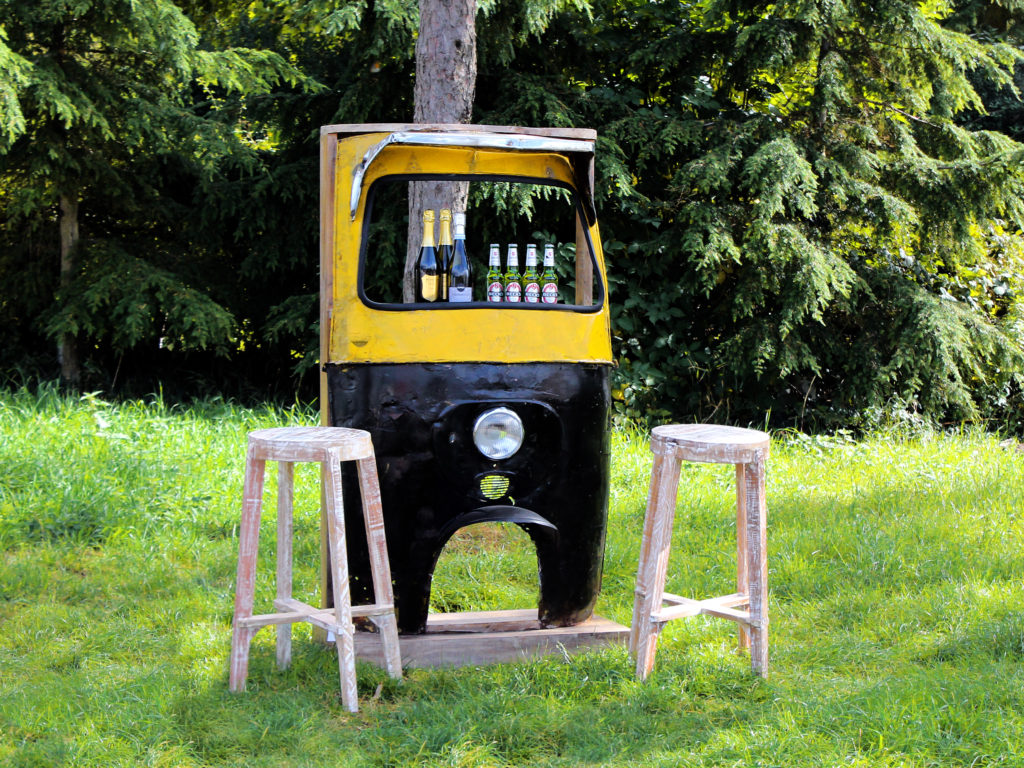
Featured: Our Up-cycled Tuk Tuk Bar With Stools.

However, you also need an area where guests can relax and unwind. Having an outdoor sofa unit or suite is the perfect option. Our furniture is designed for comfort – and not just for one event but for an entire lifetime. For those with larger families or groups of friends, we recommend our spacious corner units such as the Fitzroy Corner Unit or Nevada  Corner Unit which offer enough space to socially distance.

Tip: Adding extra comforts such as scatter cushions, outdoor rugs and blankets can also help ensure that your guests are as comfortable as possible!

SHELTER

Come rain or shine, with any gathering you need to make sure some sort of shelter is accessible. Making sure to do your research on which type of shelter is best for the area is as important as the item you purchase. Deciding on whether you want the shelter as a permanent or semi-permanent structure is also important.

If you are thinking more semi-permanent, you can choose to have a cantilever  – which you can easily fold down when not in use. Using a pop-up gazebo or event shelter will also have the same effect, they may just take a bit longer to put up and takedown.

Tip: As shelters are not always designed for extreme bouts of weather, we advise implementing extra supports such as extra guy lines or fence/ground anchors where possible!

Featured: Our Royal LED Cantilever Parasol - With Built In LED's.

If you are looking for something more permanent, gazebos or screen-houses are practical and multi-purpose; with our screen-houses, some customers have even used them for their hot tubs!

WARMTH

Whether you’re one for toasting a marshmallow or one for simply basking in the warmth  (or both!), we all love to congregate around a comfy fire once the night draws in. So we recommend having a dedicated fire-pit area tucked away in the garden with separate seating – to also help with segregating the individual areas. During cold summer nights, it's much appreciated by guests too...

Our range of fire pits includes an up-cycled VW Van inspired fire pit, classic fire bowls and the famous Chesney BBQ Heaters.   Psst… we have even got log stores too – like our love heart shaped wood rack.
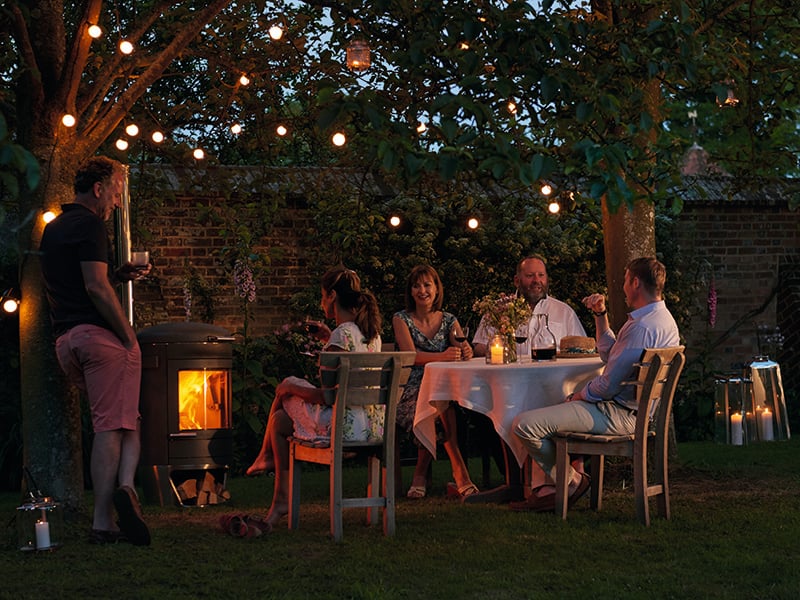
Featured: Chesney Terrace Gourmet Heater.

Tip: If you are looking for a source of warmth and a glow without the hazard, you can also use outdoor heaters for the same effect! Shop our heaters here.

LIGHTING

When the sun goes down, but you are having far too much fun to part ways, darkness can begin to get in the way. Strategically placing some decorative lighting throughout the garden can not only become very practical when dusk approaches, but it can also help to create a certain ambience to the evening atmosphere.

We recommend lighting up pathways with garden stakes, hanging rope lights above the social areas, and using larger lights around the main social areas. Using Eco-friendly lighting is always best, but remember to charge them under the direct sun well before the party.

Tip: As the light will attract critters, try to invest in some citronella candles as they act as extra lighting and a pest deterrent!


DRINKS COOLER

During the warm summer period, any event requires cool beverages. And being an outdoor gathering, what is better suited to the occasion than an outdoor drinks cooler? We have all seen the rather drab looking drinks coolers in the local supermarket. But did you know you can have a drinks cooler which also doubles up as a decoration? Our range of outdoor coolers is made to not only be practical but also fun and entertaining. Our range consists of anything from a turtle inspired cooler to a Motorbike Cooler!

Featured: King Of The Road Cooler.

GARDEN DECORATIONS

Now, the final step of the party preparations- the decorations. Whether permanent or only semi-permanent, introducing some decorations into the garden can make for talking points and add to the overall look. For a semi-permanent approach, paper hanging lanterns, bunting, and even using flowers or scented herbs is a great approach to quickly transforming the garden – assuming the weather is on your side of course!

However, we would advise that investing in more permanent decorations in the garden is more practical due to their long-lasting nature plus they generally tend to look more expensive and finished. Our garden ornaments are built to last, even when left outside all year long. So they can deliver that extra wow factor at your party, time and time again. You can find ornaments such as the likes of Percy The Flamingo or his friends within our ornaments range. Who knows, you may even build a collection!
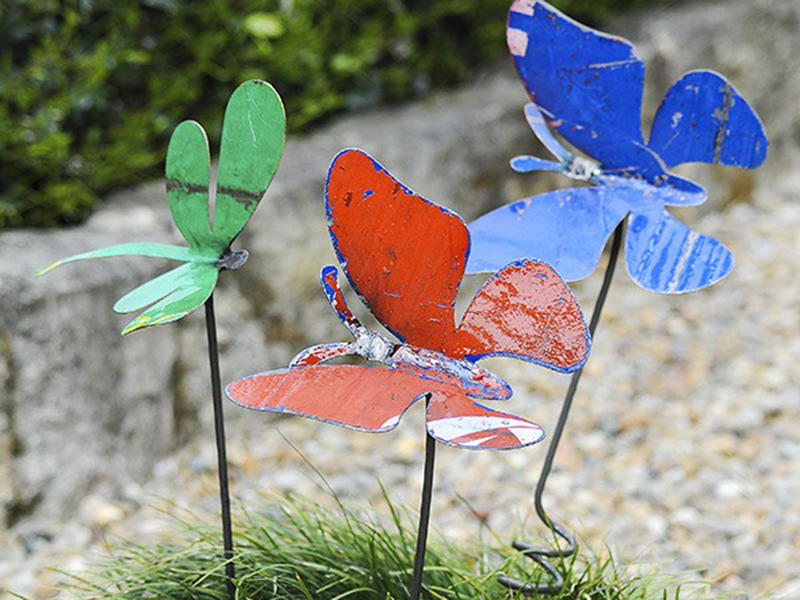
Featured: Butterfly Stakes Set Of 10.

So, you are all set! Now it's time to kick back and relax with a nice cold beverage before the mad rush of your guest’s arrival. Good luck! We hope you will have a memorable and safe reunion with your family and friends.

If you have found this guide helpful, we would love to see your snaps – you can send these to us through our social media pages as linked below!

Facebook | Instagram| Twitter 


Blog Written By: Lucy Canoel

Blog Published By: The Garden Furniture Centre

Things You Didn’t Know You Needed This Christmas…

Things you didn’t know you needed this Christmas – The Garden Furniture Centre edition! We’ve put together a merry list of all things festive which we believe everyone needs this December! From garden stakes to table firepits – we’ve covered it all! Whether you’re looking for gifts or homeware, we think you’ll find this guide somewhat helpful… On the 12th day of Christmas my true love sent to me… 12 festive garden stakes! Well, maybe not twelve but Ten! Newly added this year, our festive garden stakes are perfect for popping along the garden path, among the winter flower beds, or if you are a proud houseplant parent – even among the various house plants!

Santa Claus is coming to town!… Or is he already here? This year, we have expanded our Christmas range to include even more ornaments, coolers and even our festive garden stakes. Just look at our adorable new Santa additions below! We just love them, and best of all they keep your Christmas prosecco nice and crisp when the fridge is overflowing with pate and cheese! – We are already dreading the thought of playing ‘Jenga’ with the left-over roast!

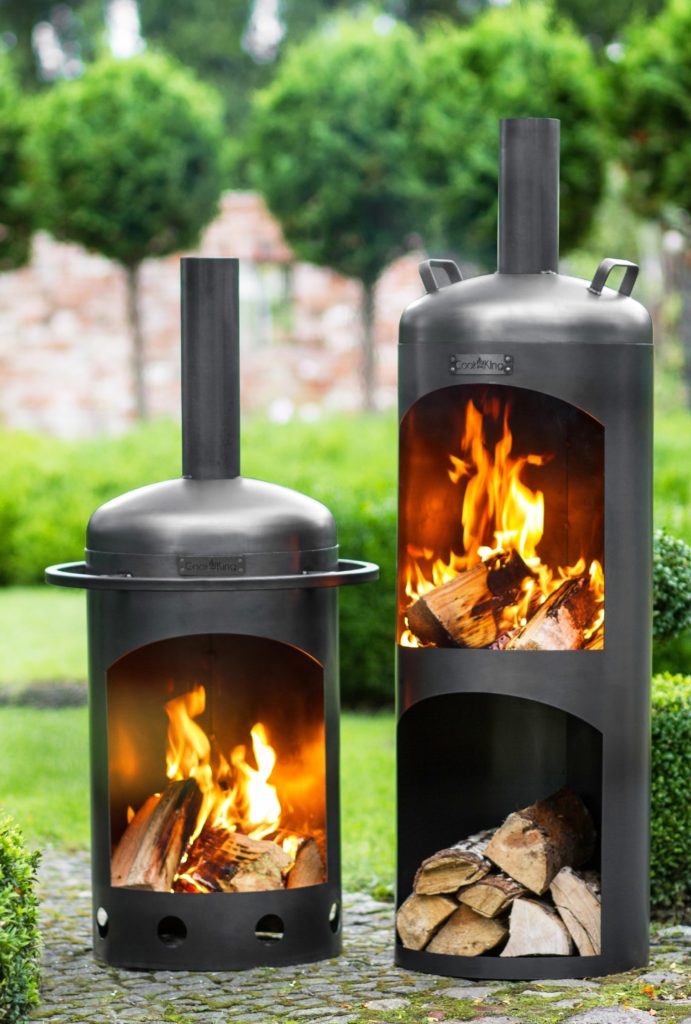
Psst… We definitely think he’s been into the Christmas cookie stash already! Baby, it’s cold outside… Well, it doesn’t have to be! Not only do we sell a wide range of outdoor heaters (including ones with built-in Bluetooth and oscillating features) but we are also a proud retailer of Cook King’s beautiful range of outdoor fire stoves, which come complete with outdoor grills. Even in the winter, start outdoor cooking in style whilst keeping exceptionally warm! So, take a wander and see how you would like to keep warm in the chilly evenings!

All I want for Christmas is… A Cocoon Inlay Burner! Close your eyes, take your current possibly uninteresting or outdated outdoor dining table, and visualize transforming it into a modern statement piece… Now open them! Our Cocoon Burners do just the job. Revamp your existing dining table into a stylish and practical statement table with the help of our Burners… It’s so simple to do too! Take a look at our quick guide on the simple installation process on our website… And if that still doesn’t persuade you, we’ll even come and install for you… Just ask us for a quote!

Those Christmas lights, Light up the street… Well, they may not be traditional Christmas lights, but they will light up your garden, lounge or dining area! Our solar lights are perfect for creating a warm ambience within any outdoor space any time of the year – we especially love the thought of our ‘string lights’ strung underneath one of our gazebos with an outdoor seating area beneath! These lights are perfect, not just for the festive season but for the entire year!

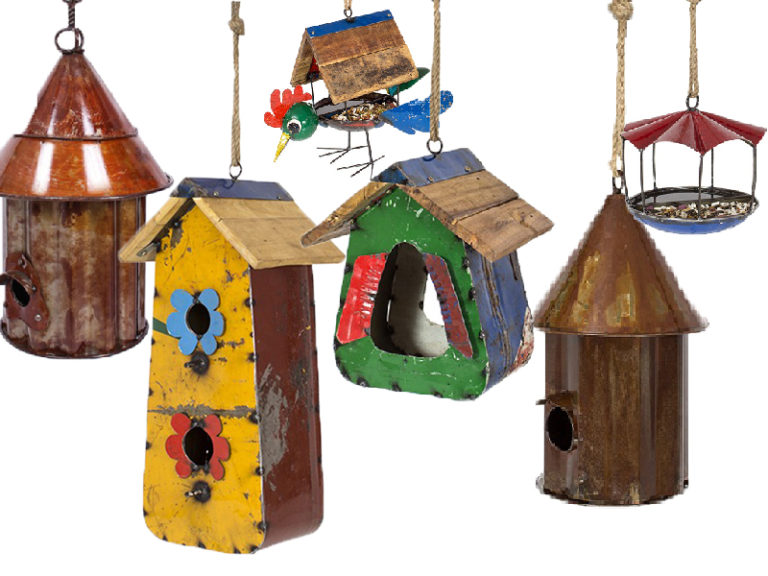
Did we mention our LED lights also have built-in speakers?… View our light range today. Let it snow, Let it snow, Let it snow!.. Let it snow! And don’t worry about your feathered friends because we have a whole section just for them! Our wildlife Thinkoutside range is full of birdhouses and feeders perfect for keeping your feathered friends protected and fed during the tough winter months. We know nesting season is over but who knows, they may decide to relocate after seeing these quirky new houses!

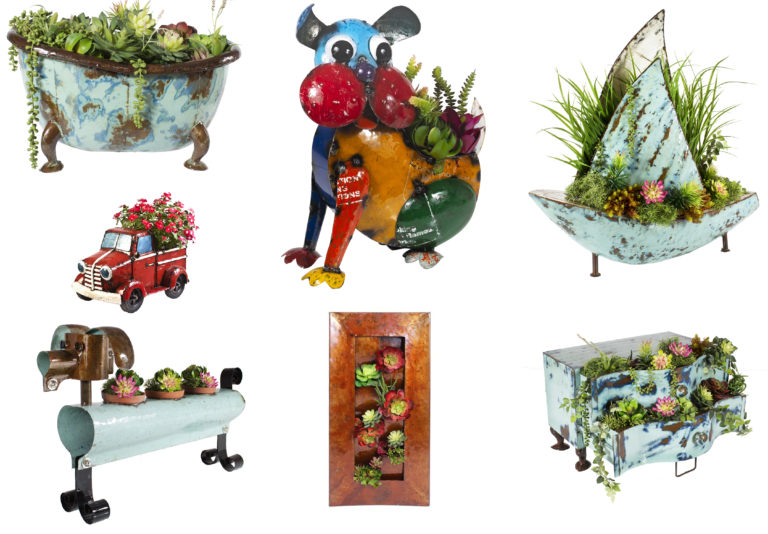
We’ve got everything from bright and colourful, to warm and rustic… Which style do you prefer? You can view the entire range here.  Do you have that friend or family member who just loves a plant or two, or ten? Browse our newly expanded planter range which has a variety of quirky planters you will not find anywhere else (yes not even on ‘not on the Highstreet’). Best of all, almost all our planters are reclaimed or upcycled, meaning your green-fingered friends can sleep easier knowing their planters were sourced responsibly!

We hope this little list has given you new inspiration from the normal Christmas essentials and hope we have helped cross off some of those head-scratching gifts from your Christmas list!

If you are still stuck on what to buy, you can also purchase gift cards which are perfect for helping towards the bigger ticket items like our Galaxy Gazebo or Havana Swing Seat. We are still offering quick delivery for most items – with our smaller items being delivered within seven days, so be sure to get your order in before the Christmas rush! Happy shopping and festive wishes from all of us at GFC!

If you have found this guide helpful, we would love to see your snaps – you can send these to us through our social media pages as linked below!

Top 10 Houseplants For Beginners

Top 10 Houseplants For Beginners...

The Houseplant market has recently seen a huge spike in sales. And it is no wonder as our time spent indoors has increased significantly during the pandemic. Purchasing houseplants is a brilliant and effective way of bringing the out-doors, in-doors. Houseplants are not only known for their air-purifying abilities and the aiding of mental health, but they can also help in really pulling a room together.

For those of you who are considering introducing houseplants into your homes but are unsure of your abilities to maintain healthy plants, we’ve put together a list of the top ten houseplants which require minimal care and provide maximum impact!…

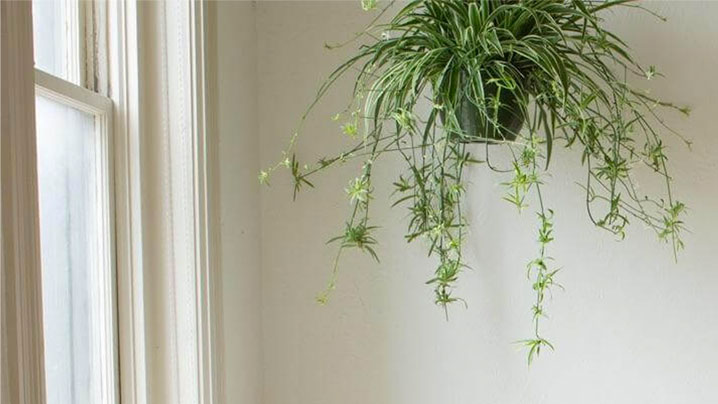
SPIDER PLANTS

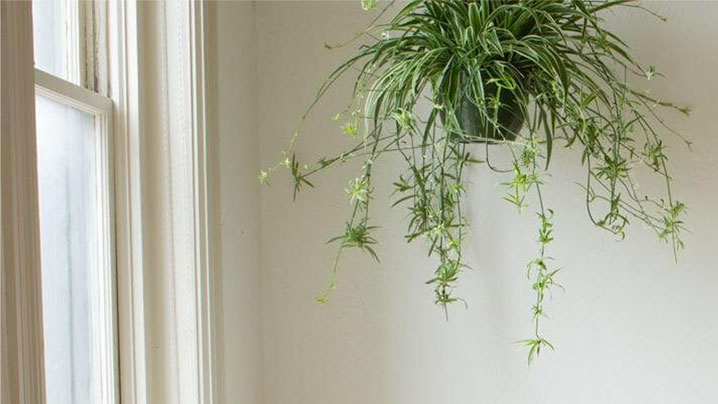
This popular species of house plant rose to the top of the popularity list due to its ability to survive extreme conditions – come droughts, overwatering and low or high-light areas, this hardy species will always bounce back. So, if you’re just starting out with house plants – start here! Spider plants are also fantastic air purifiers and without assistance, they will easily sprout spider ‘babies’ – which means more plants for you!

  • Ideally, they like moderate indirect light and moderate watering – mine always seem to be thirsty!
  • There are a few varieties out there – my favourites being ocean and bonnie.
  • They are non-toxic to pets.

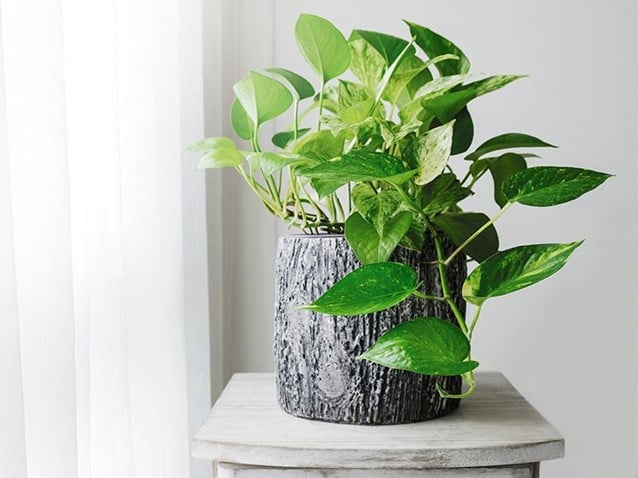
DEVILS IVY – OR GOLDEN POTHOS

A part of the pathos family, this plant is not only beautiful with its glossy leaves speckled with yellow, white and light green, but it’s also very hardy. You can pretty much find this one in any supermarket. If treated kindly it will thrive and grow as long as you allow it! Plus, it is easily variegated so you can buy one plant and end up with many more. Choose to grow this on a coconut pole or leave to trail.

  • Generally, they tolerate indirect moderate light but do not like to be overwatered.
  • If you love this variety, make sure to check out the others such as Neon pathos and Marble Queen Pothos.
  • Toxic if consumed.

ALOE VERA

The humble Aloe Vera plant, found in any supermarket, is the perfect houseplant for a beginner. Aloe Vera tolerates most conditions and is a great medicinal plant to have as it acts as pain relief from scrapes and burns when applied topically. Plus, it is unique formation is somewhat impressive!

  • Aloes like being in a bright but indirect location with minimal regular watering.
  • Aloe Vera toxicity level is mild for pets.

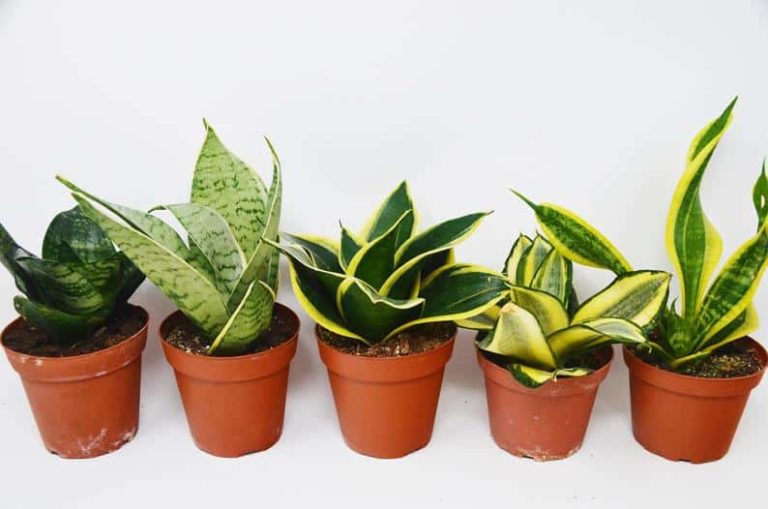
SNAKE PLANT

Snake plant, or mother-in-law's tongue, is a must for any houseplant owner. In fact, this plant will grow almost anywhere in the home, tolerating low light areas and minimal watering. Snake plants are usually available in most garden centres and supermarkets. The structural style of the plant pairs perfectly with modern interiors.

  • Snake plants enjoy medium to low light and regular watering.
  • Toxic if consumed.

ZZ PLANT

The ZZ plant has risen in popularity recently and we can tell why! This plant is not only a stunning formation of stem and leaves but also thrives in most conditions. ZZ plants generally do not like to be overwatered and can tolerate low light areas – so perfect for the darker spaces! ZZ Plant. We do not own this image.

  • Water when the top two inches of soil is dry. They don’t mind low light but do not keep in a completely dark room.
  • Toxic if consumed.

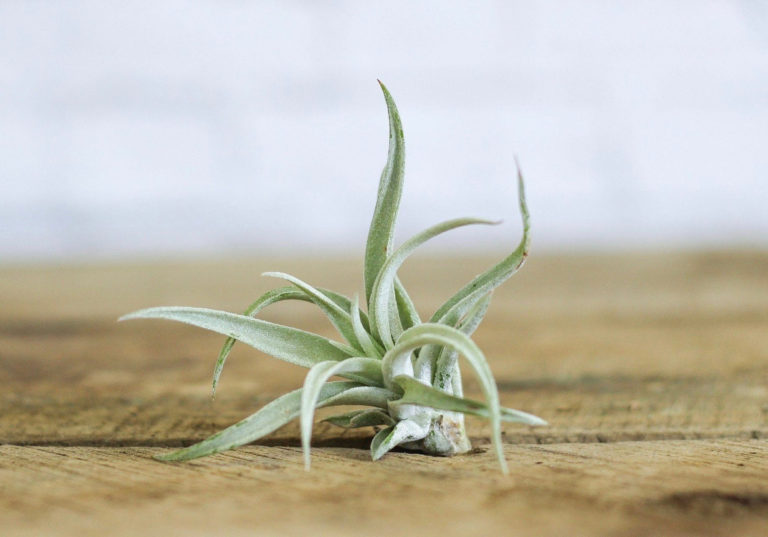
AIR PLANTS

Air plants can add a magical touch to any room – I especially love the ‘Spanish moss’ variety. Although Air plants don’t require a substrate such as compost to survive, they do require regular soaking. However, this can be only thirty minutes of soaking a week to make them thrive. The rest of the time they are free to float! Air Plant.

  • Soak the plants weekly for best results.
  • Non-Toxic to plants and humans.

JADE PLANT

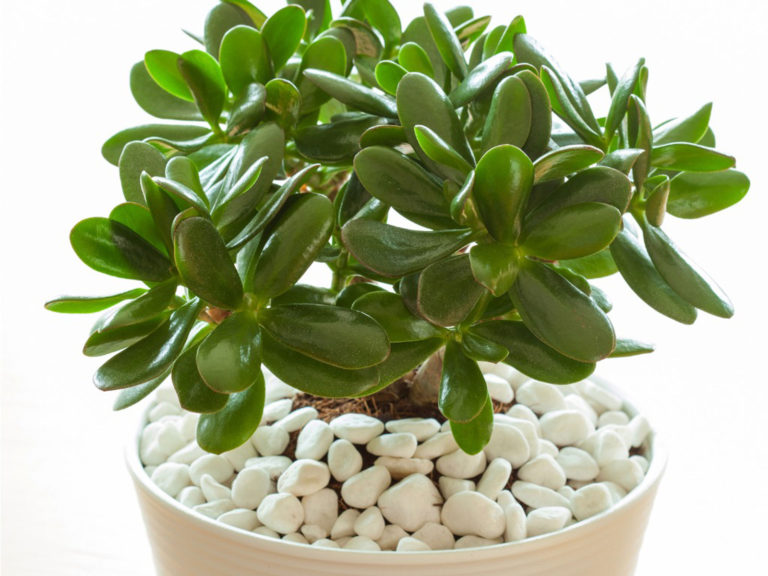
Jade plants are slow-growing minimal maintenance house plants – so they are perfect for beginner house plant owners! In fact, these plants are so independent they have been known to survive months without any attention! Although, that’s not something I recommend!

  • Water when the soil is dry and keep in moderate light.
  • Jade plants are toxic if consumed.

PEACE LILY

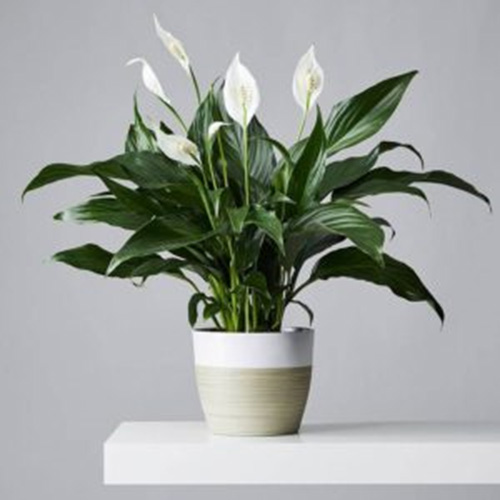
The peace lily is as peaceful as they sound! Peace lilies are brilliant air purifiers, thrive with minimal attention and look beautiful in any environment. I recently saw some fantastically sized peace lilies in B & Q – it took me all my strength not to buy one! Peace Lily. We do not own this image.

  • Place away from direct sunlight and keep the soil moist but not waterlogged.
  • Mildly toxic if consumed.

DRACAENA

Also known as the ‘dragon tree’ is a perfect plant for those with busy lives. This plant will tolerate being slightly forgotten about!

  • We recommend low to moderate indirect light and water when the topsoil is dry.
  • Dracaena’s are toxic to pets.

FERNS

There are many species of tropical and subtropical ferns ideal for being house plants, however, I recommend ‘Birds nest’. Ferns like to be kept moist and warm with regular misting and low to moderate light. This makes them perfect for bathrooms and kitchens!

  • Mist regularly, keep the soil moist and place in low to moderate light.
  • Some ferns can be toxic and cause skin irritation.

We hope you’ve found the perfect house plant for the beginning of your houseplant collection… And believe me when I say collection! Once you start, you’ll find it hard to stop! We would love to see your houseplants – so please feel free to tag us on Facebook or Instagram!

The Art Of Houseplant Propagation

During the lockdown, houseplants sales increased substantially – in fact, according to ‘Patch’, an online plant retailer, their sales increased around five hundred per cent during the lockdown. However, buying fully established houseplants can cost a pretty penny. Propagation is a way to increase your plant collection for free, plus it’s super simple. Below we have put together some general advice that will assist your new journey into the art of house plant propagation.

So, you’ve probably heard the term before, but just so we’re all clear – propagation means to grow a new plant from a small piece (or cutting) of another. This is different to growing plants from seed, or ‘splitting’. But remember, not all plants are suitable for propagation.

Choose your plant

Choosing beginner-friendly plants will allow you more wiggle room for mistakes, so choose wisely! We recommend the popular ‘Golden Pothos – or Golden Ivy’, ‘Swiss Cheese Plants – Monstera Deliciosa’, Spider Plants or Succulents for beginners, as these are super simple to propagate. Choosing any plant from the Pothos variety, such as the mentioned Golden Ivy, Marbled Queen or Satins, will provide you with a new plant in a much shorter time frame than others due to their quick growth rates.


Cutting

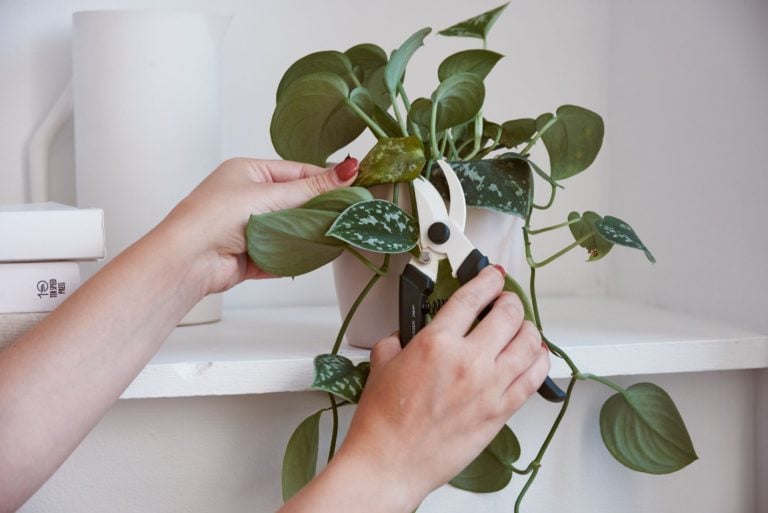
When cutting your plants, make sure your equipment is cleaned after every plant. This diminishes any chance of cross-contamination of diseases or pests between plants. Making sure you have sharp scissors is also essential as blunt scissors can result in damage to the plant.

Where you cut the plant is vital. Again, this depends on the plant type. Some species will form ‘offsets’ to the sides of their main form – these are essentially ‘babies’ from the mother plant. Plantlets are also referred to as ‘babies’ as they also grow from the mother plant. Stem and cane cuttings, however, are just that – cuttings from the mother plant. Leaf cuttings are like stem cuttings, but of course from the leaf itself. When you have performed stem, cane, or leaf cuttings, it's best to leave a gap between cutting to planting.

Pothos plants require the cane to be cut to propagate – about an inch below the ‘nodes’. Whereas Spider plants are propagated from their plantlets and Succulents from their leaves.


Rooting Methods

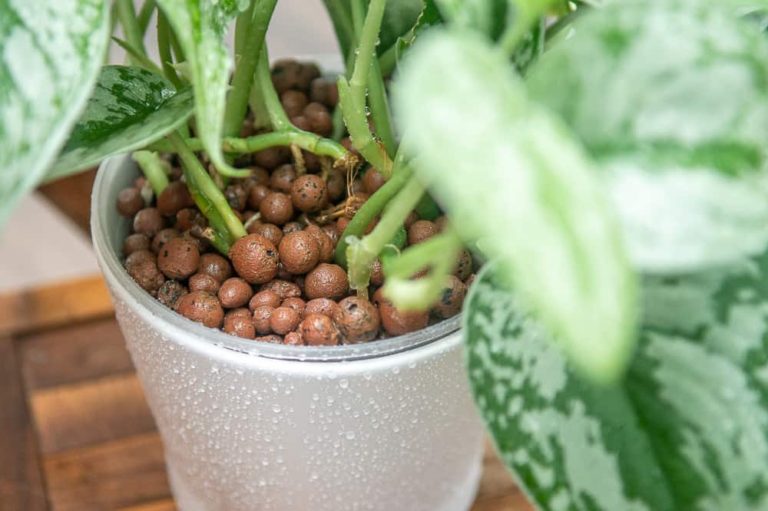
Some cuttings may need the help of ‘Root Hormones’ to help stimulate root growth. Root hormone can come in a range of forms – powdered, gel or liquid. It is best to do a quick google search beforehand. Pothos, Succulents and Spider plants usually do not require this. After cutting and applying the hormone, you will need to choose your rooting method – water, LECA clay pebbles, Perlite or soil. Who knew there were so many choices?! Choosing your rooting method depends on which plant you have chosen to propagate – Pothos and Spider plants will do well in water, whereas Succulents tend to thrive better against soil and moss.
Top Tip – Play with the different rooting methods and define one which works for you!

Neglect

cuttings will need more care and attention than your fully established houseplants. This could mean changing the water every few days or adjusting the placement if it is a cloudy or sunny week. Completing and neglecting your plants will increase your chances of propagation failure, so keep on top of it!
Image not our own.
Timing

Plants, unless kept warm and artificially lit all year round, will assume a ‘hibernating’ state or ‘dormant' in the winter. Therefore, we do not recommend propagating in the winter. The best time to propagate is during the spring and summer months when feeds, watering and light are at their highest. This will make for strong propagation. Propagating is a waiting game, so be patient.

Placement

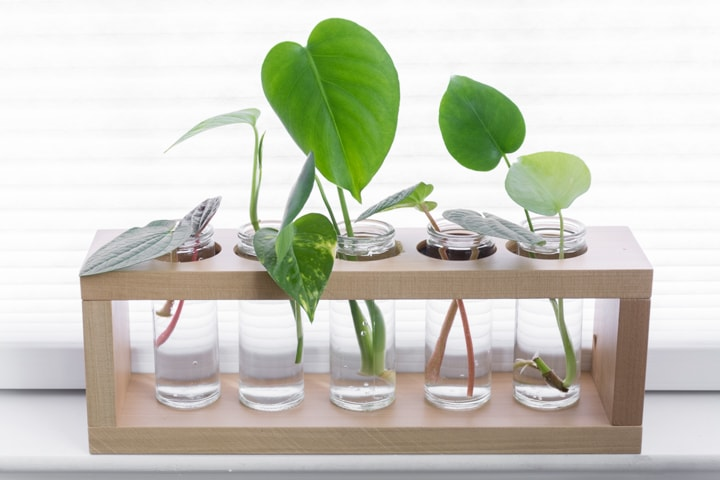
Generally, cuttings like to be placed in a warm and indirect brightly lit spot where photosynthesis can take place. Placing them in a dark pot will prevent the roots from growing. Whereas placing the cuttings in a spot too sunny may result in yellow or brown leaves. We recommend also using clear containers, such as glass jars, for your cuttings.

Top Tip – We recommend setting up a ‘propagation station’ where you can keep an eye on your cuttings all at once. You can buy some cheap ladder shelving online for a more ‘aesthetic’ look!

Growth

After around two to three weeks, you should see some white roots emerge. For Succulents and cacti, this tends to take a little longer. As a rule, you should wait until roots are at least an inch long or three-quarters the size of the leaf cuttings, before attempting to pot. If your cutting has failed to grow any new roots, we recommend restarting the process with a new cutting. If your cutting has more than one node, you may be able to trim the cutting until it is below a new node and restart the process.

So, let’s get propagating! We would love to see your ‘propagation station’…

Following this guide, we hope you successfully propagate your plants. It’s a great hobby and money saver! We will be releasing a new post every other week or so, so make sure to follow our blog!

You can tag us on our socials – Don’t be shy!

House Plant Care Tips

House Plant Care Tips...

Are you a new plant parent or have you just recently realized your plants may need a little more TLC than you originally thought? Well, we’ve got you covered! We’ve put together a little (but detailed) care guide on general house plants below. This guide will not only help you keep your plants alive but hopefully help them thrive!…

Please keep in mind that each plant has its own specific needs and you should really keep this as just a general guide, ensuring to research your specific plant’s needs.

LIGHTING

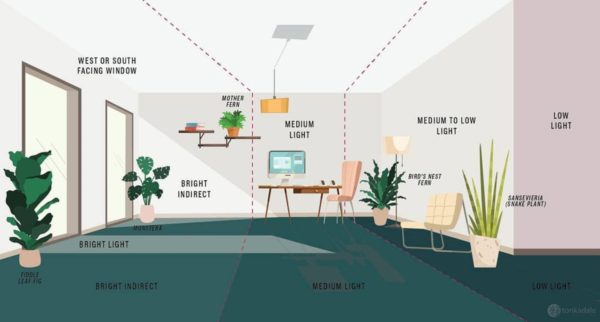
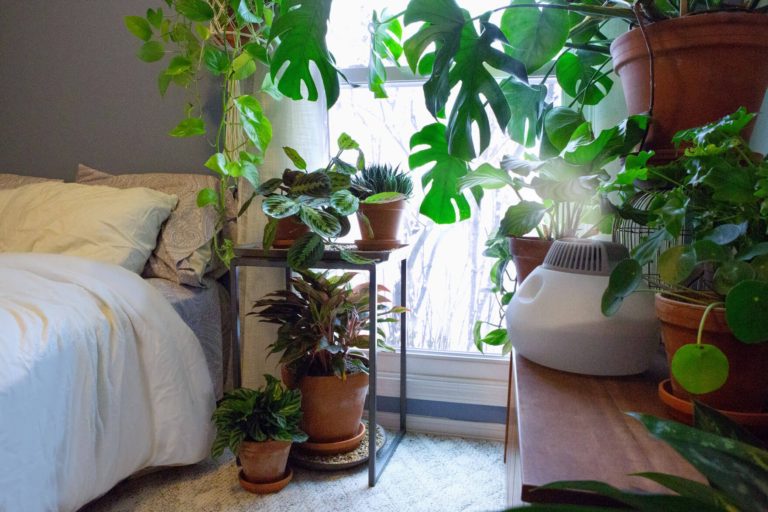
As a rule, most house plants require bright filtered light. The further back from your window, the lower the light levels. However, it is important to remember direct sunlight through the glass can cause scorching and browning of the leaves. Plants such as cacti’s and succulents will thrive indirect light. However, most house plants enjoy bright but indirect light. Some plants can also thrive in low light conditions – such as ZZ plants, dragon trees and sansevierias.
During the winter light levels fall and this is where repositioning your plants to a brighter spot closer to the windows can be beneficial; just make sure it is not too cold by the window. If your home is as dark as mine, you can always invest in some artificial lighting…


Top tip – To ensure all your leaves get their share of light, simply turn your plants every few days.

HUMIDITY

Most houseplants thrive in warm rooms and even temperatures all year round. During winter, move plants to rooms that are not overheated during the day, but maintain the required minimum temperatures. Avoid placing plants near open fires, radiators, in draughts, or on windowsills on frosty nights.
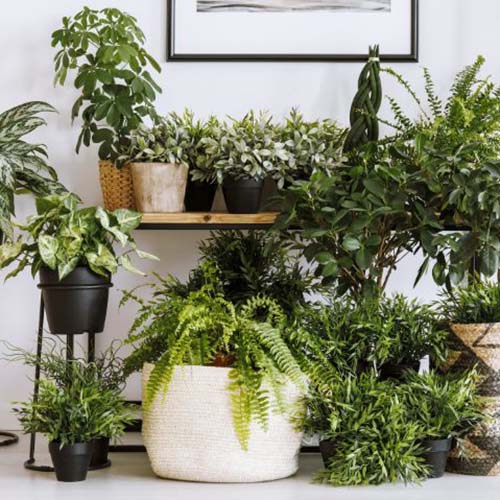
Tropical plants require a humid atmosphere. Certain areas of your home will be naturally more humid than others, for instance, bathrooms and kitchens. How quickly the compost dries out is a good measure of how dry the air is. So, it is best to make use of these areas for your more humidity-loving plants – Alocasia, Philodendron, ferns.

For areas that are not so humid, invest in a humidifier or regularly mist your plants. However, it is important to note that some plants do not like misting as this can cause mould and fungi. Misting is best done with tepid water in the morning. Rainwater or water that has been boiled is best as it will not leave white deposits over your plant's leaves. Better yet, place on a tray of damp gravel or expanded clay granules – or anything soluble. Grouping plants together will also help to create a humid micro-climate around their leaves.


Top tip – If you are worried about the temperature and humidity of your house, invest in a digital Thermo Hygrometer; you can find them for as little as ten pounds on amazon.

FEEDING

A few signs to know that your plant needs a feed is pale leaves, slow growth and lower leaves falling off. Plant food is generally made up of nitrogen and phosphates with other trace elements which are generally present in most compound fertilizer’s.
Knowing when to feed your plant is important. The spring and summer is the best time to feed your plants, however, some plants just cannot cope without a feed during winter. If your plant is in a very poor condition then it may be needing a feed. If not then feeding is only generally carried out over the growing season, i.e., spring and summer, about once to twice a month. You can use a liquid feed or slow-release fertilizer. If you have just re-potted your plant, then you have a couple of months before the food within the compost runs out. Only feed as much as is stated on the feed.


Top tip – If you’ve got a few plants on your hands, you can time your feeds to coincide with each other. There are some great reminder apps out there for house plant feeding too – such as ‘florish'.

WATERING

Watering correctly is the key to owning any houseplant. Overwatering can lead to the dreaded root rot and the slow killing of your plant, whereas watering too little can cause the plant to wilt. However, speak to any plant enthusiast and they would prefer a drought-ridden plant to a root rotten plant anyway!
Generally, popping your finger into the soil of the plant and seeing if the top two inches are dry is the best way to check it needs watering. If the compost sticks to your finger, you do not need to water; unless it is a plant that likes to keep relatively moist such as spider plants and ferns. To ensure your plant drains well and does not get root rot, use plant pots with drainage holes and a water tray/well. Watering from the bottom can also help prevent pests and improve root growth.

PRUNING AND TRAINING

Pinch back shoots of young plants when in active growth to encourage branching. Trailing plants usually benefit from this treatment. Ferns especially like being pruned down and often come springing back. Most leafy, mature foliage plants need no pruning.
Many houseplants, except for orchids and palms, can be renovated by cutting the old or damaged foliage back to base or by pruning to a healthy bud in spring. But make sure to not cut anything green off as this will cause browning. Water and feed well to aid recovery.


Top tip – Remember to use sharp pruning scissors and to sterilize in-between pruning each plant to avoid spreading disease or contamination.

PROBLEMS

One thing an experienced house plant parent will look for when searching for their new plant ‘children’ is pests and diseases. To check before purchasing can save a lot of hassle, time, and money. However, admittedly we can get carried away with a deal just too good to pass up and end up skipping the thorough inspection process! Make sure to check your houseplants for pests and diseases such as aphids, red spider mites and scale insects before introducing them to your existing plants.

One way to reduce the invasion of pests to your plants is to isolate your new plants from the other for the first 48 hours of purchase to avoid spreading pests or diseases. Whilst isolated, shower over your plant to remove any unwanted free riders and gently mist with houseplant pest killer or a mix of neem oil and water. Make sure to continuously check for common signs of pest such as spotting on the leaves, sticky substances on the leaves, mould, or dusty appearance.

Following this guide, we hope your house plants stay healthy & continue to grow! Feel free to tag us on Facebook or Instagram.

Activities To Do With The Kids This Spring

Activities To Do With The Kids This Spring...

Apart from the obvious choice of an Easter Egg hunt in April, we have put together some unique Easter & Spring themed outdoor activities for the entire family to enjoy whilst the ‘rule of six’ restrictions is still in place…

Build An Insect House

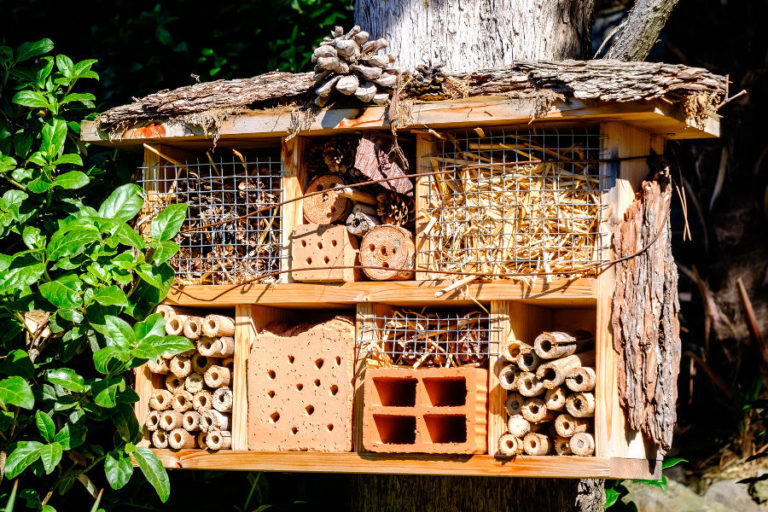
So, by now we all know the importance of looking after our little beasties in the garden. One way to aid our local wildlife is to build them their own little ‘house’ within the garden. Just by using scraps of wood, twigs, pinecones, bamboo stakes and bark, you can provide hundreds, if not thousands, of cosy nesting places for your local bees, butterflies, and ladybirds. You can even finish it off by creating a ‘wild garden’ using wildflower seed packets – the creative possibilities are endless!

We think even adults will find this activity satisfying… Plus this is something you can revisit time and time again to observe how the wildlife will use your creation.

  1. Choose materials and size of the house – Forage from the garden – leaves, wood chippings, bark, old logs, bamboo canes and terracotta pots.
  2. Start by building the ‘main frame’ with some wood, non-toxic wood glue or nails. and Placing the frame flat onto the ground. Nail or glue together.
  3. Alternatively, create a ground-based hotel by simply leaving it in situ.
  4. We would advise then adding wire or mesh to the ‘back’ to hold in the stuffing, perhaps even closing it off with wire completely after filling! Then simply get busy filling in the spaces! We advise using a range of sized materials and textures to encourage a variety of wildlife.

Don’t forget to build a roof! – Even bugs hate getting wet.


Building A Natural Tipi

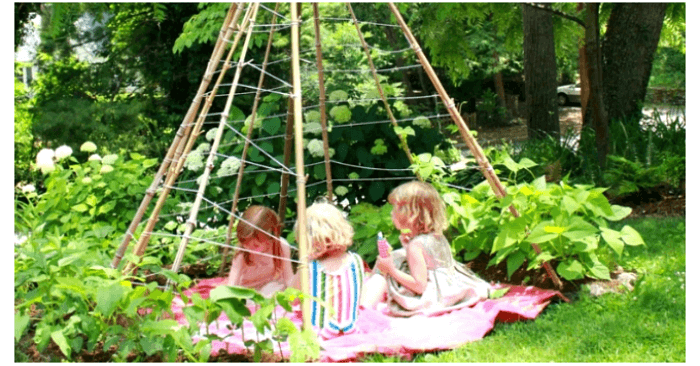
This one is certainly designed for anyone with green fingers and a creative mind! By using just natural items such as bamboo stakes, string or twine and some runner bean seeds or climbing flowers you can create a natural ‘tipi’. This shelter is not only cost-effective and eco-friendly, but it is somewhere for the kids to play during the warmer spring and summer days. Once fully established, you can also stylize it with fairy lights, lanterns, a comfy rug, and some cosy blankets for cooler evenings.

  1. All you need is some runner bean seeds, compost, twine/string, bamboo or wooden poles, and some strongly scented climbing flower seeds! Oh – and some patience!
  2. First, determine size and location – hopefully somewhere sunny.
  3. Mark the tepee ‘footprint’ with string.
  4. Then amend the soil ready for planting, adding nutrients into the mix.
  5. When you are ready, pop the tepee poles in place and tie the top ends together so they stand by themselves. Then tie your way down the poles to create a sturdy ‘web’. Remember to keep a doorway in mind!
  6. Finally, plant your seeds, cover, water and wait!

Keep checking on the growth; redirecting or supporting the plants as they grow!


DIY Bird Treat Creations

The choir of the birds chirping away in the morning is a true sign the seasons are changing. Creating your own birdseed creations with your kids is a fun way to help your local birds thrive throughout spring whilst keeping your kids occupied! Who doesn’t love saving a few pennies AND keeping your kids busy?…
All you need is five simple ingredients – stale or lightly toasted bread, peanut butter, birdseed, cookie cutters and pipe cleaners or ribbon. And remember, this DIY is designed with kids in mind!

  1. Begin by cutting out the middle of the bread with a cookie cutter.
  2. Pop a pipe cleaner through where you want the bird feeder to hang from, making sure to twist the ends together. Alternatively, you can also use string or some funky ribbon, string, or shoelaces!
  3. Then, spread the peanut butter over the shape.
  4. Dip the bread into some bird seed.

And voila! It really is as easy as that! You can encourage the use of plastic tools for greater creative thought, allowing them to create their own shapes and character silhouettes.


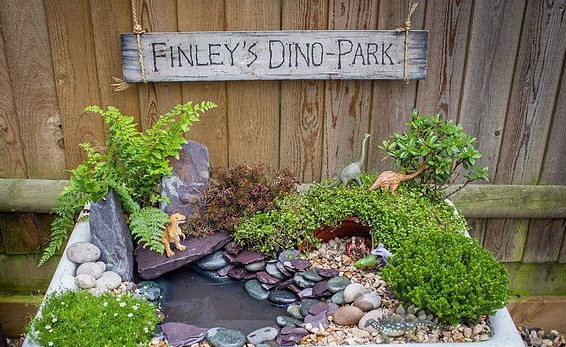
Building A Fairy Or Dinosaur Land

During this strange time, spending time outside is important for our mental and physical health. Using the time spent outside to help design and build your child’s very own fairy or dinosaur house will encourage their love for nature whilst keeping their creative minds active. With just some gathered items such as terracotta pots, pebbles, stones, wood, moss, and flowers, you can help them create their very own dreamland – in miniature form of course. The best part is, is it is completely free- or at least it can be! We suggest helping them visualize their creations with some crayons and paper beforehand.

  1. A container to house their creation. An old plant pot, tire, or even just on an area out of harm's way.
  2. Just like a regular house, begin with a ‘base’. We suggest pebbles, moss or just some soil! We love the idea of ‘paths’ made with pebbles.
  3. If they want a fairy house, we suggest using a terracotta pot with a drawn-on door. You can also buy cheap fairy houses online.
  4. Add the foliage and greenery! Let them get creative – pluck some wild-grown flowers or foliage. Just be careful the plants are not dangerous. We would advise choosing rooted greenery, so the land continues to evolve.
  5. Add accessories – by adding some small logs and a picket fence made from lollipop sticks you can transform the look! For Dino land, we suggest making a ‘pond’ with an old shallow bowl.
  6. Add your characters – using existing toys let them bring their lands to life.


Easter Egg Hunt

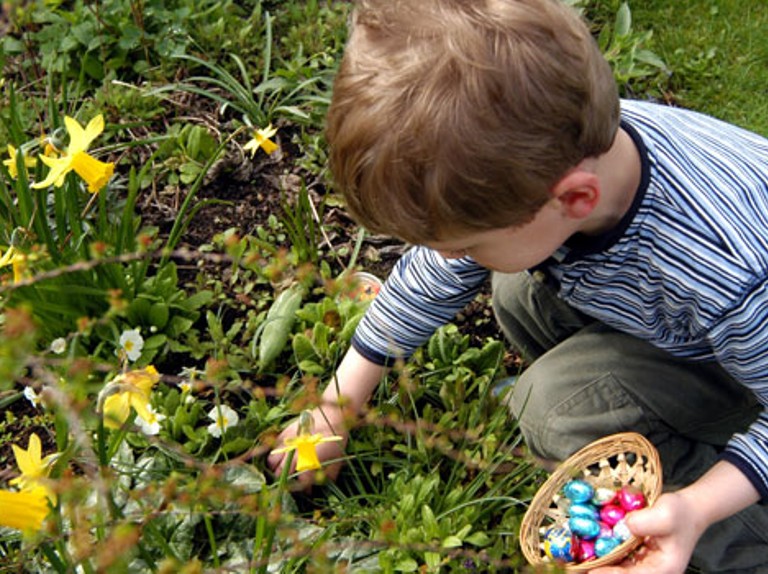
An Easter classic and one that never disappoints! You know the drill… Hide some eggs around the garden (or the house if the weather doesn’t permit) and hold a competition to see who can find the most. You can make the egg hunt more challenging by adding clues!
Image not our own.


Following this guide, we hope you can inspire your kid's creative minds and their love for nature.

We will be releasing a new post every fortnight or so, so make sure to follow our blog!

We would love to see their creations – so please feel free to tag us on Facebook or Instagram!

Creating An Outdoor Cinema At Home... | Event Series : Part One

Even though most of the entertainment doors have now opened, as a nation we are coming up with more and more inventive ways of how to stay entertained within the safety of our home.  As a result, we'll be putting together a short series on hosting events at home - from building an outdoor cinema to creating your very own glast-home-bury!

I have recently noticed there seems to be a viral trend of people setting up their own outdoor cinemas. And I have to say, they are quite impressive set ups! So, we thought we would put together a simple guide on how to create your very own outdoor cinema - complete with the essential ticket checking and rustling snacks. Whether it's just for us adults or for the whole family, this activity can be enjoyed by all…

THE TECHNICAL STUFF…

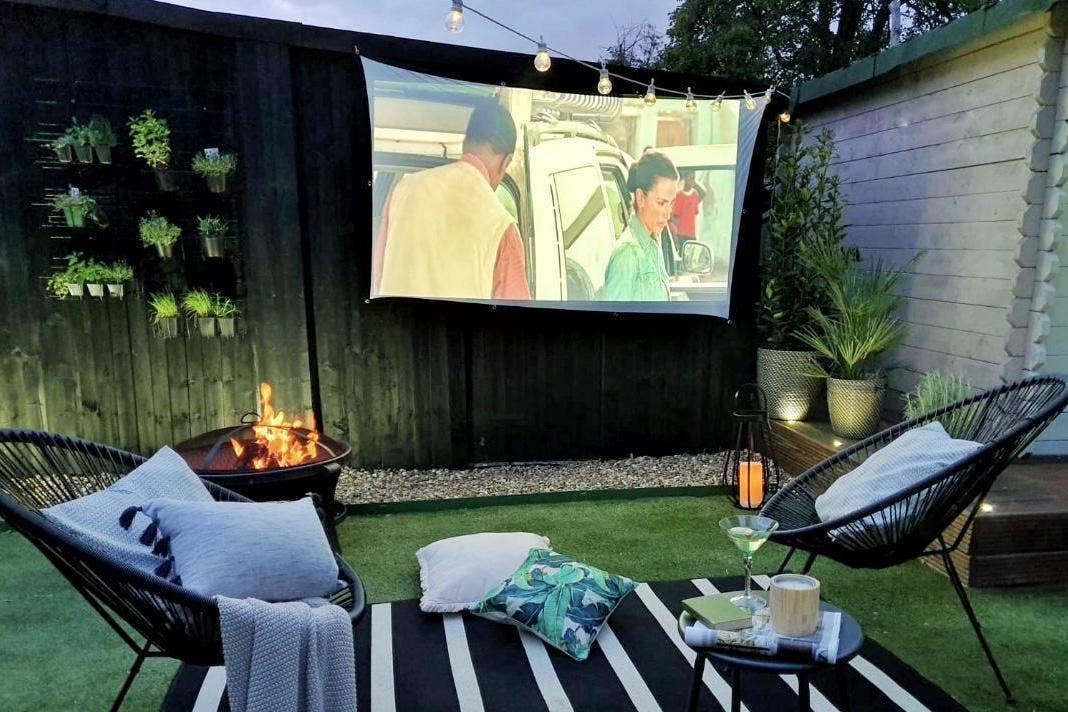
To create your very own outdoor cinema, you will need either a projector or television screen. Although you may think that projectors can be pricey, in fact there are many decent projectors on the market today with a very small price tag; some even starting from £30! Given that you can use the projector time and time again, you can always see this as an investment!

Once you have the projector, you will need a 'screen'. You will also need a speaker if your projector does not come with (non-robotic) one built in. Obviously, all projectors are different so be sure to read the features carefully when choosing your projector, as some can be wireless, others can be HDMI only and whilst some may have speakers included, others may not. For the screen, a simple white sheet attached to two stakes or strung across a hardy clothing line will suffice. Once you have the screen and projector sorted, you will need to ensure the audio, whether built in to the project or not, works effectively too. As stated, this depends on which projector you have chosen.

TIP: Its important to take into consideration the device you stream the film from. If this is a laptop or iPad, you may need to have an extension cable leading out of the house to keep it charged up... Just the little things people tend to forget! 

Hopefully now you will have the technical stuff down so we can move onto the fun part…

SEATING AND COMFORTS –

Image not our own.


One of the most memorable parts of a trip to the cinema is the hit or miss cinema seats… One visit you can be placed right in front of someone who decides your seat is their personal footrest, the next visit you can find you are the only viewers for miles – well for rows! Having a cinema at home however, you can have guaranteed comfort and the best views. 

Choosing the seating and the comforts that go with the movie is almost as important as the movie itself. Now, the obvious choice would be an outdoor lounger or day bed. Some may already have one, for those who do not, do not fret as we have plenty available! Personally, we think buying an outdoor day bed is completely justified for an event like this!... For those who are looking for something with a dual purpose of perhaps both dining and lounging, we also have a large range of luxury outdoors sofas. Take our Timber Corner Sofa… It is big enough for the whole family to sink into, yet it can also accommodate for your alfresco dining needs…

However, placing an outdoor blanket down with some cushions is completely acceptable too! Foldable or inflatable seating would be a great alternative also. 

FOOD AND DRINKS –

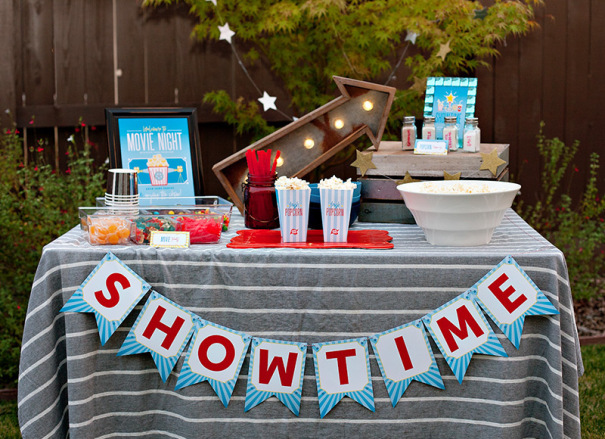
Whilst some of us may go just for the movie, others go for the butter drenched popcorn and Tango Ice-blasts. To be a real cinema experience, the incorporation of rustling packets is a necessity. Microwave or hob butter popcorn, M&M’s and Pick’n’Mix, are luckily all available at your local supermarket - Tango Ice blasts not so much. 

However, we also suggest introducing other food items to really elevate the experience. Finger food which requires little or no preparation like miniature pizzas, burgers and French fries would go down a treat! You can even produce a fitting paper menu and give them out to your ‘customers’ – any leftovers can be snacked on later!

TIP: We suggest serving these with cinema style food accessories, like miniature popcorn boxes, napkins, and paper straws to really add to the cinema feel. You can purchase these at various places online.

LIGHTING –

We have all been there, stumbling down the dimly lit cinema steps trying to locate where the stairs stop and the path to the exit starts…

The addition of ‘aisle’ or overhead lighting is also advisable – they have these in the cinema for a reason! Using fairy or string lights work perfectly, however the use of candles and re-used glass jars is as affective. Our string lights are the perfect lighting for this occasion and may even give you slight ‘festival’ feelings by adding some extra ambience.

HEATERS, FIRE PITS AND CANDLES –

Being outdoors during the nights of spring and summer in UK can still be glacial. Therefore blankets, heaters and firepits will be needed. We have a range of heaters and firepits which may just do the job. If you opt for an ambient firepit, a quick check of the wind direction and distance from the ‘screen’ goes without saying.

TIP: We all know we can become a mosquito magnet outside at night, by introducing the use of citronella candles you can save your skin from the invasive pests.

PLAY THE ROLE -

With the addition of fake ‘tickets’, an ‘usher’ and an introduction before the beginning of the film may help transform the evening.

Tip – Use free online templates to create your personalised tickets. Use a holepunch for ticket stamping for a more immersive experience.

PERMANENT OUTDOOR CINEMA –

If you find the night a success or you are already looking for a permanent outdoor cinema room or area, our gazebos and screenhouses are the perfect canopy. In fact, we even advertise the Galaxy Gazebo as this due to their very practical screens which can be using to project upon! You can find all of our gazebos and screenhouses online. If you would like to see them in person, you can also visit our showroom in Warwickshire.

Now you have got everything sorted, here comes the hardest part… Choosing the movie! We would advise choosing your movie wisely – but if you really have trouble deciding, making the movie night a regular occurrence could help with the issue!...

We hope you have all the success with your outdoor cinema night, or shall I say, nights!

Please feel free to send us any pictures of your outdoor cinema set ups.

Good luck!

Blog post by Lucy Canoel

Creating Your Glast-home-bury... | Event Series : Part Two

Despite the cancellation of Glastonbury, we are still hoping our beloved festivals will persevere. However, in the event festivals are once again postponed, we feel it is only safe to prepare for a DIY Glast-home-bury experience.  The second part of our ‘Garden Hosting Series’ features how to host your own ‘Festival’. Although this may struggle to compete with Glastonbury, we think you will still have a memory as joyful and precious as attending the real deal! Creating your own Glast-home-bury experience does come at a cost, however we think you will soon forgive yourself once you see the joy it brings...

To create your very own outdoor cinema you will need to combine last week’s DIY Cinema with some new additions…

THE LINE UP - 

Every festival has those quirky encouraging activities in-between performances – from breakdancing dance offs, the best hat award, food eating contests to my favourite, sock wrestling. Putting together a real ‘schedule’ or line-up of the day, which includes live or revisited concerts playing in-between, banquet eating, activities and a ‘closing ceremony’ will really help bring the festival together. We suggest hula hooping. 'giant' cardboard noughts and crosses, DIY ribbon dancing and sack racing! 

Tip - We recommend even replicating one of your favourite festivals printed schedule.

GET CREATIVE - 

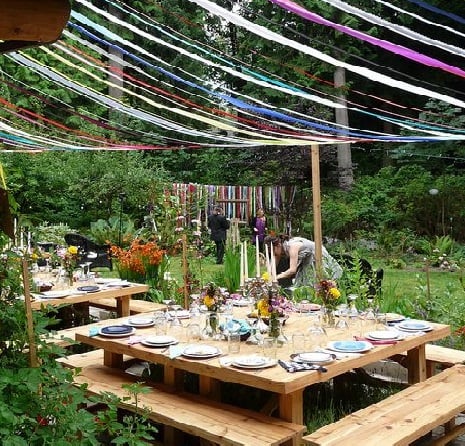
It would not be a festival without the glowing guidance of festoon lighting or the copious amounts of colourful bunting! With the addition of festoon lights, bunting, and perhaps even festival flags, your garden will be transformed into a glowing wonderland. A creative flair will also save you some pennies when it comes to decorating on a big scale. With just some cheap hula hoops or embroidery hoops you can create some quirky and lightweight ribbon chandeliers. Using the same reels of ribbon, you can also create a 'ribbon tent' with just some long sticks, pillows, and throws. This 'tent' can also act as the glamping campsite!...

Tip - Using old glass jars with candles inside will also work!

DINING ALFRESCO - 

Choose your location of the ‘dining hall’ and get decorating! A festival food tent is something other worldly, so grab some ambient lighting, flowers, bunting, an outdoor stove, hot plate, or warm up the BBQ and set the scene! Although you may want to replicate some festival classics such as breakfast burritos or mac and cheese, cooking is optional and ordering from a local street food restaurant or picking up some ready-made goods will suffice. Using natural decorations such as flowers, wood, feathers, and candle lit jars adds to the outdoor festival aesthetic. The use of an old wheelbarrow or bucket can also assist in keeping those cherished refreshments cool. For a fully immersive experience, we love the idea of including a ‘festival’ style menu along with name place holders.

MOVIE TIME -

In our previous post to this series, we assisted you through creating your own immersive outdoor cinema experience, which will now come to some good use! Grab a projector, speaker, white sheet, pillows, and snacks to create your very own outdoor cinema. A ‘show time' of certain movies can also be included in your schedule.

Tip - Use DIY signage posts throughout the ‘site’ to mark areas, such as ‘Cinema’. You can do this with some wood or cardboard and a lick of paint!

SET THE STAGE - 

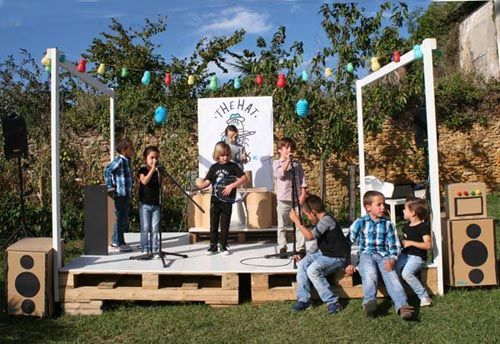
Although a no live band may be off the cards, you can still include the addition of a ‘stage’. Using some old pallets, or LED tiles, you can create a ‘stage’ area where the kids are free to ‘perform’. Creating a ‘backstage’ area with a prop station including bought or DIY prop creations may also provide some amusement and creativity. An outfit competition springs to mind... 

KEEPING TOASTY - 

Those who have witnessed the rolling fog during the early hours at festivals will know that even during the height of summer the air can become glacial. Therefore blankets, heaters and firepits will be needed. Place your blankets in a 'help yourself' basket for an authentic festival feel. If you crave the roaring glow of an open fire at festivals, we have a range of firepits which may just do the job. If you opt for an ambient firepit, a quick check of the wind direction and distance from any of the surrounding ‘areas’ goes without saying – We wouldn’t want you to fail the festival safety inspection!... 

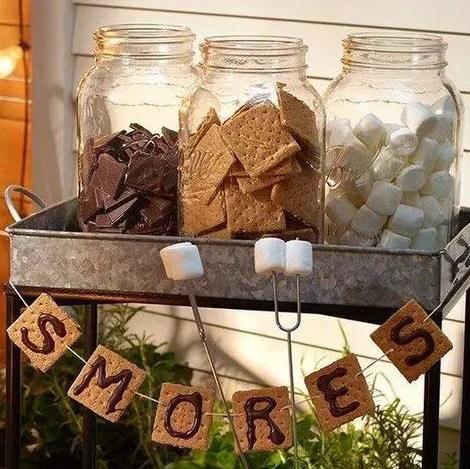
Tip - Set up a 'smores' station including jars of marshmallows, crackers and chocolate, plus skewers, for a delicous and toasted snack! 

PLAY THE ROLE -

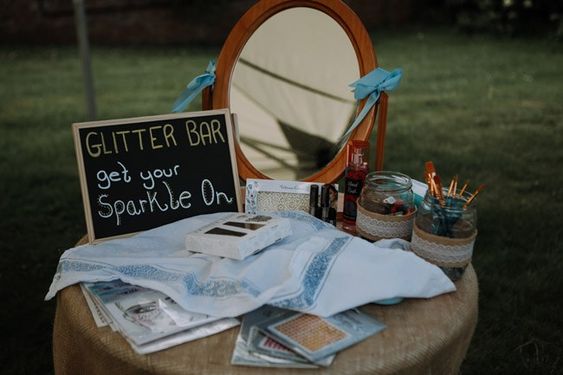
So, as festival tradition goes, grab your most colourful outfits, glitter up and throw on anything that lights up – it’s time to take a trip to Glast-home-bury! If you are truly committed to the experience, you can even hold a fancy-dress ceremony at the beginning of the festival. To do this, make sure to pick a theme, set some criteria and choose a time frame to allow for costum making beforehand. Creating a 'glitter' or 'face paint' station may also come in handy for the forgetful...

Tip – You can purchase or create your personalised tickets and wristbands. Create a ticketing and security area at the ‘entrance’ for a real experience of festival delight!  

We hope you have all the success with your Glast-home-bury!

Please feel free to send us any pictures of your set ups.

Good luck!

Blog post by Lucy Canoel

Vegetables You Can Regrow From Scrap

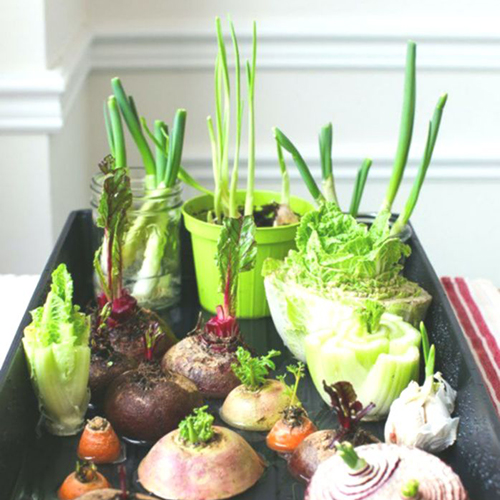
On average, we seem to consume more than we produce. Growing your own food can seem daunting and costly at first – however this is far from the truth. By using your food scraps, you can create food for virtually no money.

The BBC states that an estimated 6.6 million tonnes of food in the UK is being wasted each year. This ethical way of growing plants helps us broaden our relationship with the life cycle of food and nature, helping to tackle the evident food wastage issue.  This blog is going to show you how to grow food from food scraps you would usually throw away!

Some methods require the purchase and use of plant pots and soil. A loose potting or peat-free soil is suitable for most methods.

The following methods are simple ways to reduce our food waste in a productive way!

Green Onions

Green onions are arguably the easiest and most popular vegetable to regrow. All you need to do is the following:

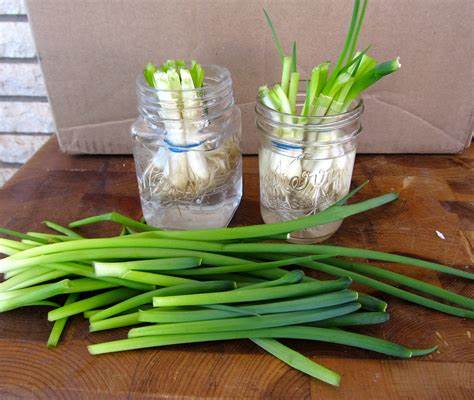
  • When cutting the green top off the spring onion, leave approx. 3-5cm of the white root base.
  • Place this white root section into a jar and fill with water until half of the plant is submerged.
  • Leave in a bright spot and change the water every other day.
  • Harvest directly from the jar when ready!

Leeks

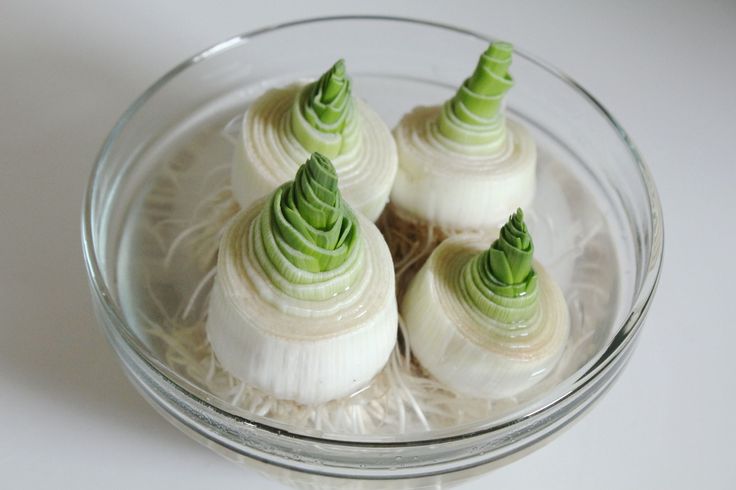
Following the green onion method above, you can regrow your leaks! Although, be patient as they may take slightly longer due to their size. Leave a couple of inches from the bottom and place them in a bowl of water.

Celery

Celery can also be regrown from the base of a mature plant.

  • Cut all celery stems off, leaving 3-5cm of stem at the root section.
  • Place this root section in a bowl with warm water.
  • Place the cutting in a warm and bright position, making sure to change the water every other day.
  • When the celery sprouts new leaves, you can then plant it out into soil.
  • Harvest when the plant has large, healthy looking stalks.

Romaine Lettuce, Bok Choy & Cabbage

Lettuce is as easy to regrow as celery! Lettuce leaves can be regrown from saving the root section at the bottom of the lettuce. This propagating technique works best with Little Gem or Romaine varieties.

  • Cut lettuce leaves until 3-5cm of height is left on the root section
  • Place it in a bowl until the roots are submerged
  • Leave in a bright position and change the water every other day.
  • After two weeks, the lettuce should have sprouted new leaves and roots, when this happens, plant the cutting out into potting soil for prolonged growth.
  • Harvest when the leaves grow to baby leaf size (10cm).

Carrots Tops

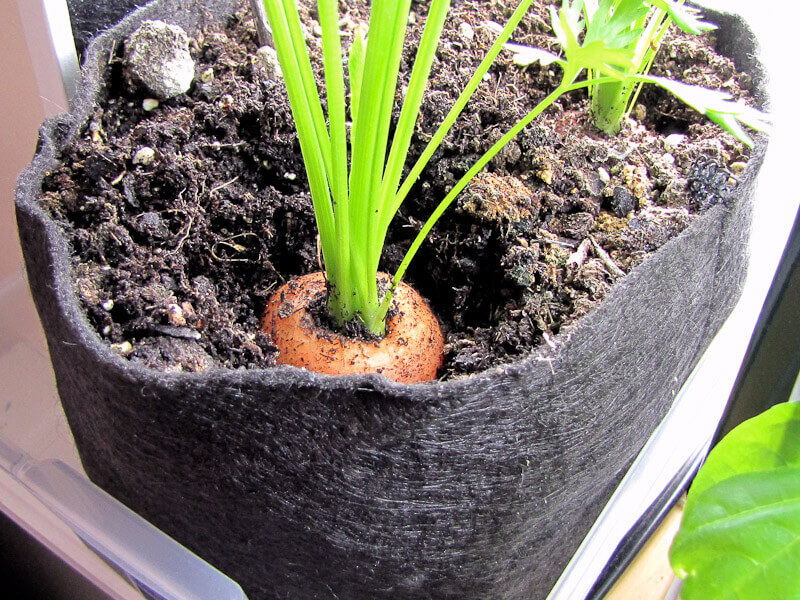
Regrowing carrot tops allows for plenty of creative dishes –quirky pesto, soup, or even saute. Simply leave the top of the carrots–with a bit of the carrot attached–in bowl or container with water and place them where they can receive adequate sunlight. Now watch them grow!

Sweet potatoes

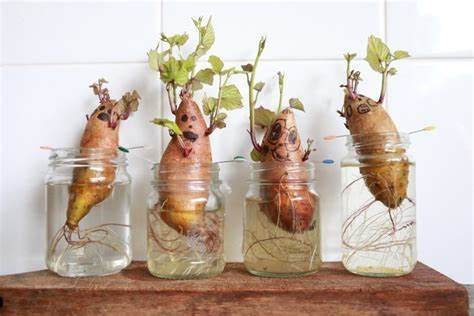
We have recently seen a trend of people growing sweet potatoes for their leafy vines to provide botanical decoration. Well, you can also propagate them to create new potatoes! It may take some patience, but Sweet Potatoes are easy enough to grow. Unlike normal potatoes, sweet potatoes, require ‘slips’ firstly; these are groups of stems and roots which grow from nodes on the potato. It is best to start this process indoors between February and April and wait until after the last frost to plant.

  • Pierce the middle of the sweet potato. Add lots of water into a jar and place it in with the facing upwards at the top (this is the pointy end).
  • Leave in a bright spot and change the water regularly.
  • Roots, stems and leaves will begin growing from nodes called eyes on the potato over the next few weeks.
  • When the slips have grown substantial roots and stems, you can break it off the sweet potato and plant into soil indoors, potting it on as it gets larger.
  • Plant them outdoors after the last frost (end of May - June). Growing them in the ground during the summer is advised because the tubers can get quite big!
  • Harvest in the autumn or when leaves begin to turn yellow and die-back.

Potatoes

You know the drill. Simple leave your spud in a dark corner, forget about it, and it’ll just sprout. You can also cut a potato in half, where you will see the dents on the skin, plant the potatoes with the dents facing up in soil.  

Basil, Mint, and Cilantro

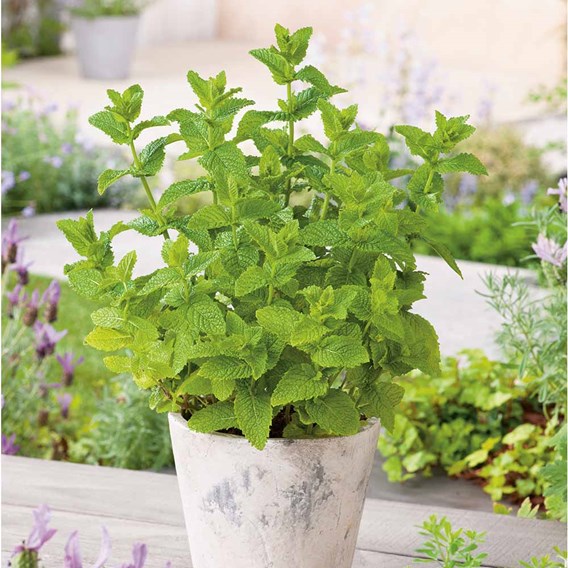
Leave about 2-3 inches of the stem. Place the stems upright in a glass of water. When the new roots begin to appear, transfer the herbs into a pot of soil and watch them grow!

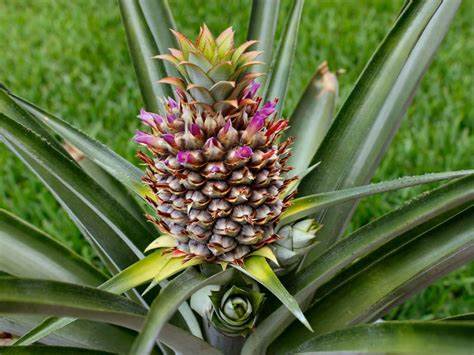
Pineapple

Although not a vegetable we thought we would throw this one in!  It just takes a bit of patience – approximately two years to be precise, but we think the thought of your very own pineapples is just too intriguing not to suggest!

Grab hold of the pineapple crown by the leaves and twist and pull. The stalk should remain intact. Expose the stalk by removing some of the lower leaves.

Leave the pineapple crown in a glass of water and allow new roots to form, transferring to a soil-filled pot or container once grown. Test the plants strength by gently pulling, should the pineapple have some resist this means you’ve successfully propagated a pineapple and you should move onto pineapple plant care.  

That’s it! There really is something satisfying and gratifying about regrowing half-consumed vegetables and fruit – plus it certainly saves some pennies! We suggest performing these propagating experiments as competitions with your little ones to teach them the values of food and bring them closer to nature.

Have you tried regrowing your own vegetable scraps?

Share with us your experiences!

Good luck!

Blog post by Lucy Canoel


Top Plants For Birds, Bees And Butterflies

A pollinator garden is a garden containing plants for bees and butterflies specifically. Specific plants are magnets for bees and butterflies, and if planted, you can guarantee these fluttering and buzzing visitors will flock to your garden – who doesn’t love watching these lovely creatures flutter and buzz around on a sunny day? But don’t be fooled, you don’t always need a garden to support wildlife – most plants are happy with windowsill and balcony pots!

Below we’ve listed some plants to inspire you on your journey to creating an insect haven in your outside space, no matter the size. After all, if we look after them, they’ll look after us and our delicate eco-system!…

The most important time for insects is early spring when the insects are just beginning to emerge. So of course, growing spring flowering plants is vital. Below you’ll notice a trend of blue and purple flowers. Did you know this is actually the bee's favourite colour range?...

Alliums and Chives

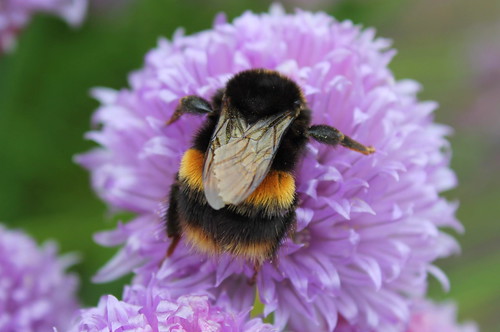
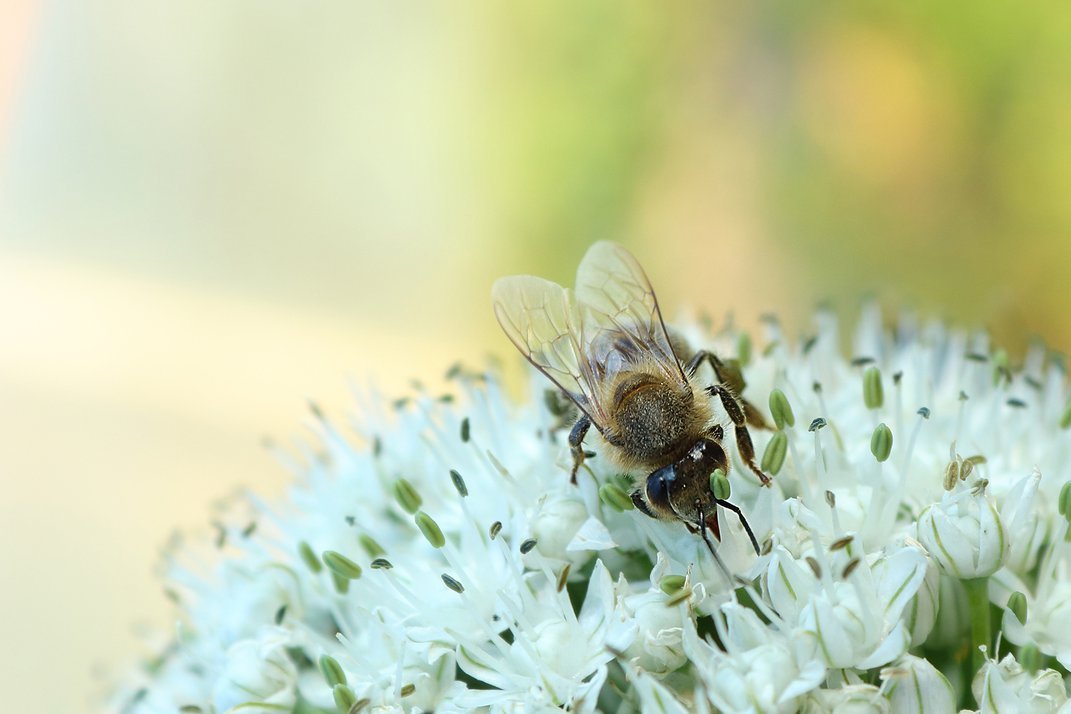
Bees love all members of the Allium family, which includes chives and onions, which if you didn’t know already, both of which flower!

Chives are a low maintenance perennial herb, once planted they will come back reliably year after year. They also make a lovely ornamental flowers for the front of a border. You can even cut the Chives back once the flowers have faded and they will often produce a second wave of flowers. Chives are also suitable for shade and containers.

Onions

In a process known as bolting, onions can produce flowers. The bees and butterflies love these flowers, so make sure to plant plenty or leave some onions in your garden bed once harvesting.

Sedum

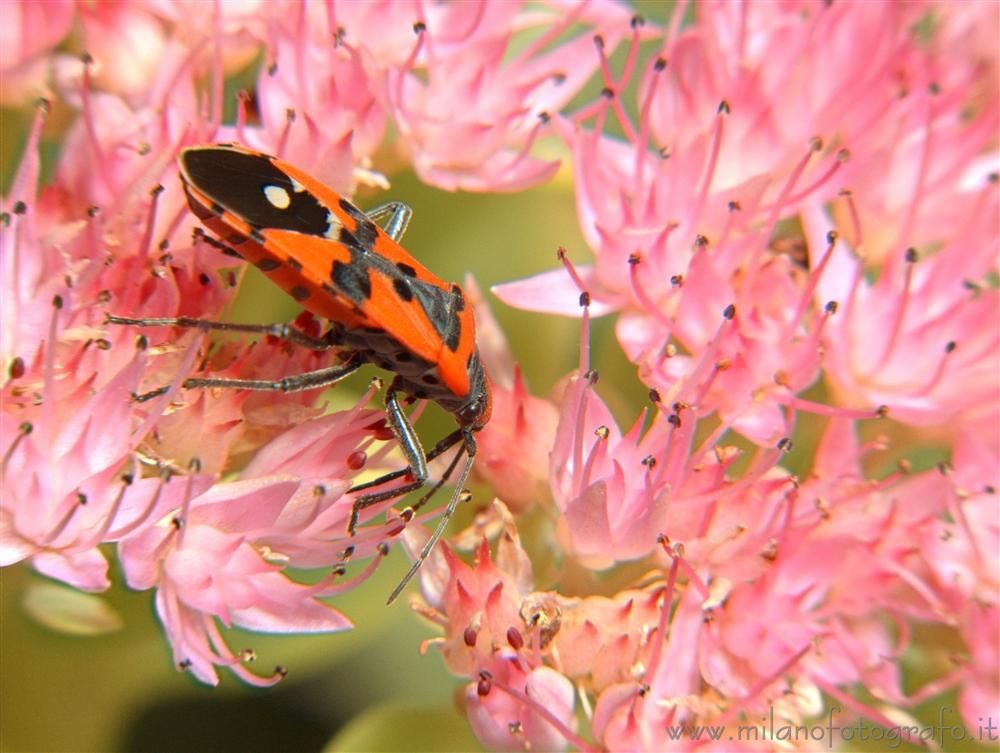
Another butterfly magnet, sedums provide a good bus stop for the bees and butterflies – a mature sedum attracting hoards of butterflies at any one time! Sedums are easy to grow and are long flowering plants, flowering from April all the way through to September.  It is thought, the Sedum flowers are attractive to butterflies even before they are in full flower, perhaps due to the aroma.  

Geranium/Cranesbill

A part of the Geranium family, Cranesbill, or commonly named G. ibericum is just loved by the bees, perhaps because of the colour (blue). Geraniums are low maintenance herbaceous perennials, meaning they will die back over winter and return with fresh new growth each spring.  There are a number of species of Geranium which are all easy and low maintenance.

Cerinthe major

An unusual plant but yet another plant which does not fail to attract bees, Cerinthe major can be grown from seed in the spring and if looked after, is an annual plant, with grey-blue foliage,  and purple flowers. Another favourite factor of this plant is the fact it self-seeds. You can even collect the seeds to hand out to friends and family!

Buddleia/ Butterfly Bush

As stated in the title, this plant gets its name for a reason. Buddleia " Butterfly Bush", which is an easy to grow large plant, attracts plenty of butterflies and pollinators. The flowers are aromatic and if planted in a warm sunny spot, the shrub will soon be smothered with hungry butterflies.

Some Buddleias can grow up to 5 meters, so make sure you do your research on the variety you choose.  Buddleia can also be an invasive self-seeder, so allocating time to prune the flower heads as soon as they have bloomed will help prevent the shrub spreading to unwanted territories.

Monarda / Bee Balm

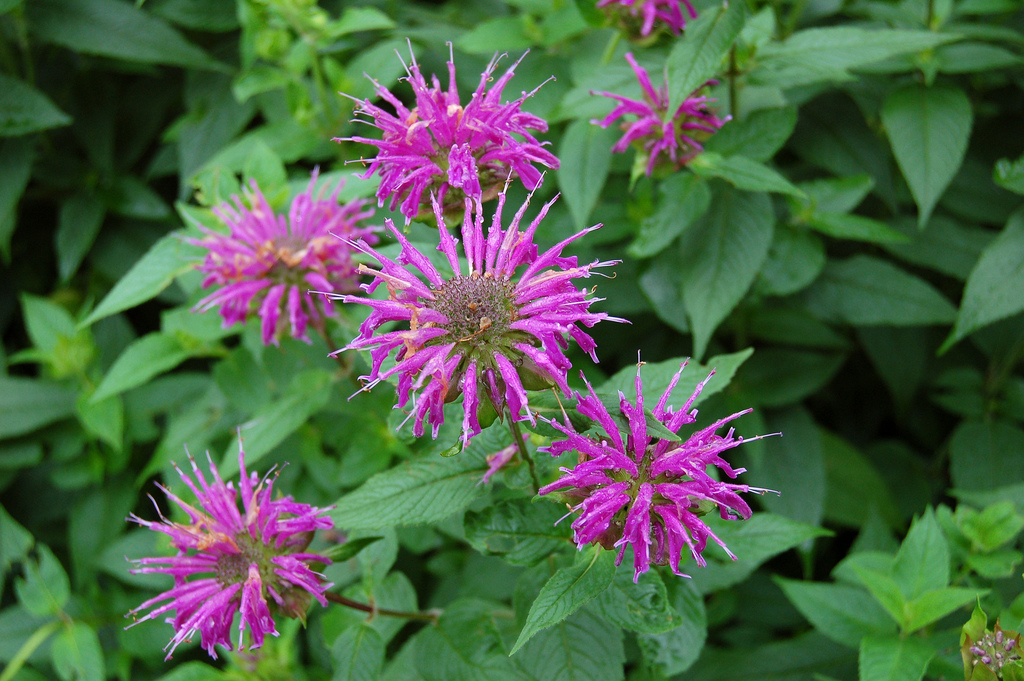
Monarda is another great easy grow bee magnet and are often proudly showcased within RHS shows. Monarda will grow in some shade, although it flowers best when planted in full bright direct light and a good well-drained spot. Monarda is another herbaceous perennial which will return each year.  However, it does not like confined spaces so it is best to avoid pots and containers.

Oregano

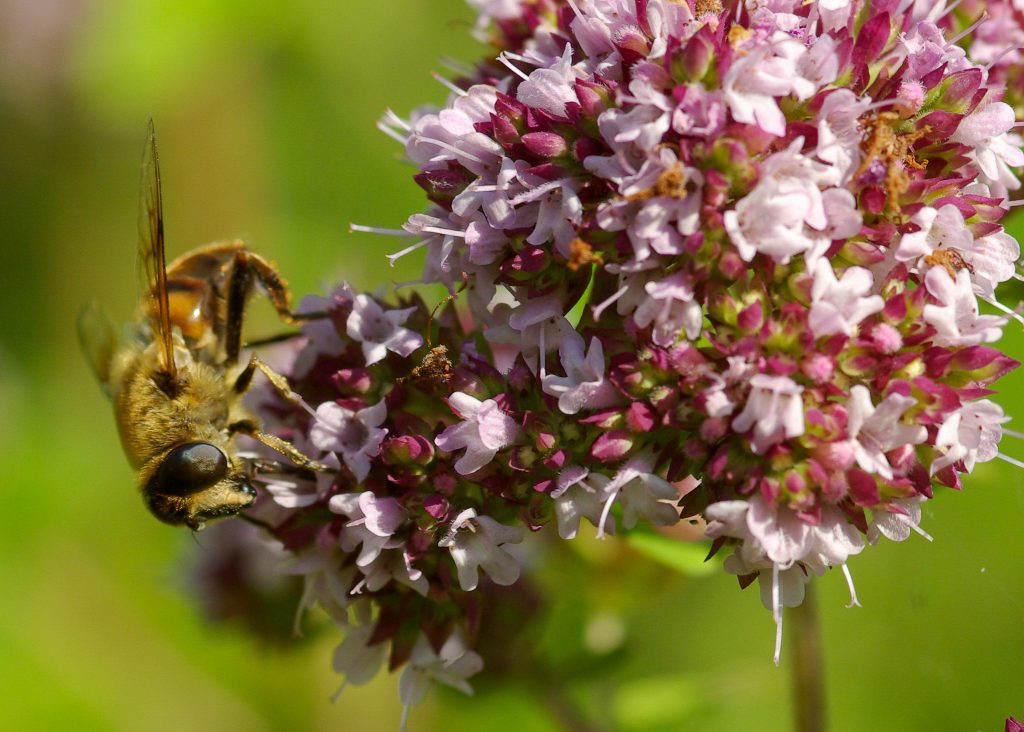
Oregano is a hardy perennial aromatic herb plant, very attractive to butterflies and pollinators. Oregano can grow so thick it can also be used in a topiary effect. However, Oregano is a vigorous self-seeder, so be sure to only plant where you do not mind the spread!  Oregano can also be grown in a container or pot.

Lavender

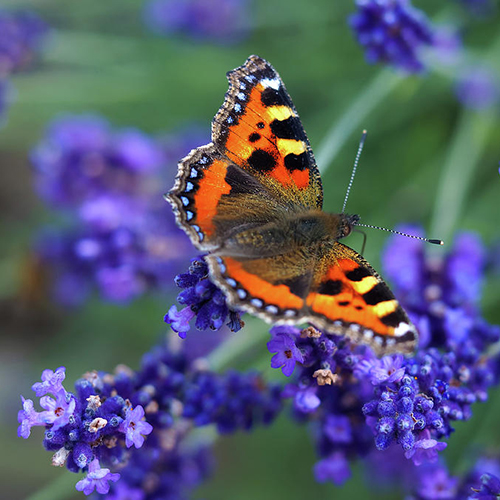
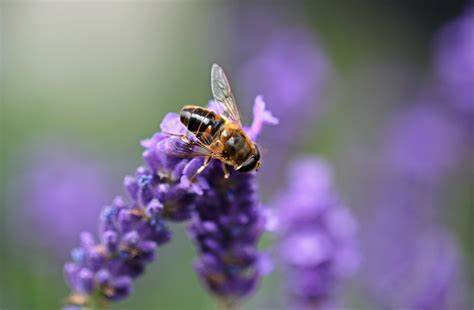
One of my favourite plants, this therapeutic aromatic plant never fails to attract bees and butterflies. However, lavender can be picky about its growing position, so be sure to take into consideration this is a Mediterranean type plant, and enjoys a warm sunny spot with dry well-drained soil.  Be sure to also consider the variety of lavender chosen as some can be more woody than others. In Uk weather, sometimes lavender does best in containers or pots.  

English Ivy

Hedera Helix or commonly known as English Ivy, once matured can produce flowers and berries which a range of wildlife will enjoy. The nectar and pollen provided by the plant are perfect food for insects such as bees, hoverflies, and wasps. Whereas the berries are loved by birds and animals alike.

We hope this blog post has inspired you in your journey to creating a better insect friendly outdoor space.

Feel free to share your own tips, tricks and shots of your insect friendly garden!

Good luck!

Blog post by Lucy Canoel

© The Garden Furniture Centre Ltd. 2024. All Rights Reserved.